I'm sure you've tried to share your website from "localhost" so everyone can access it, or show demo products to customers without having to buy additional hosting. Some services can do that like Ngrok, Localtunnel, Serveo,...
However, the limitation of the above services with the free version is that you cannot customize your own domain name, limit the number of requests, and the operation time. If you use wordpress source code then static file urls like css, js, images will get 403 error.
And then I accidentally bumped into the Cloudflare Tunnel. At first, I didn't know if it would meet my requirements. Well, let's give each other a chance.
I am really surprised at what Cloudflare Tunnel can do. Also, it's free, who can afford it?
No more rambling, in this article I will guide you to use Cloudflare Tunnel to share websites from localhost.
About Cloudflare Tunnel
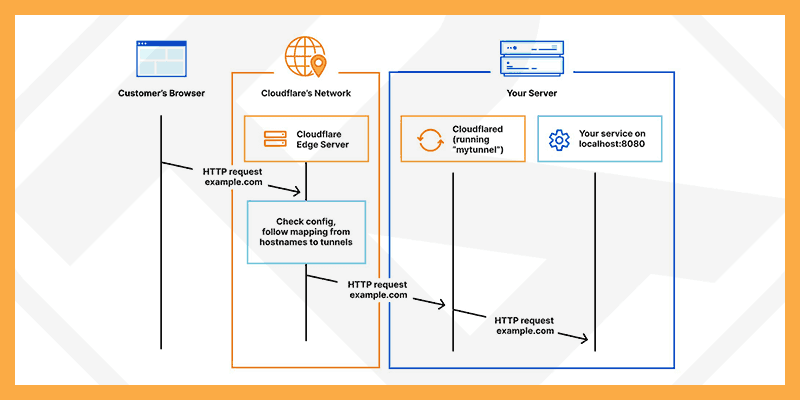
Cloudflare Tunnel is a tool that allows you to securely connect your resources to Cloudflare without the need for a public IP address.
All requests sent and received will be saved through Cloudflare. This greatly reduces the load on your device if there is a problem like DDoS, because Cloudflare will take care of it. At the same time, it also creates cache in the visitors and gives the same good speed as a real project.
Cloudflare Tunnel User Manual
Request
In order for Cloudflare Tunnel to work at its best, you need to prepare the following:
- Domain: 1. Domain Name: You need a domain name to be able to use Cloudflare Tunnel. You can register cheap domain names io.vn, id.vn. Or register a free domain name eu.org here.
- Configure virtual domain for localhost: Wamp, Xamp, Laragon tools all support this feature.
For example:- The actual domain name is domain.com
- The domain name for public website I will use an additional subdomain is public.domain.com
- Build a website based on the subdomain just created above in localhost.
Remember to create the file robots.txt to avoid SERPs indexing these sub-websites
User-agent: *
Disallow: /
Install and configure Cloudflare Tunnel
The steps to connect a domain name with Cloudflare I will not repeat in this article.
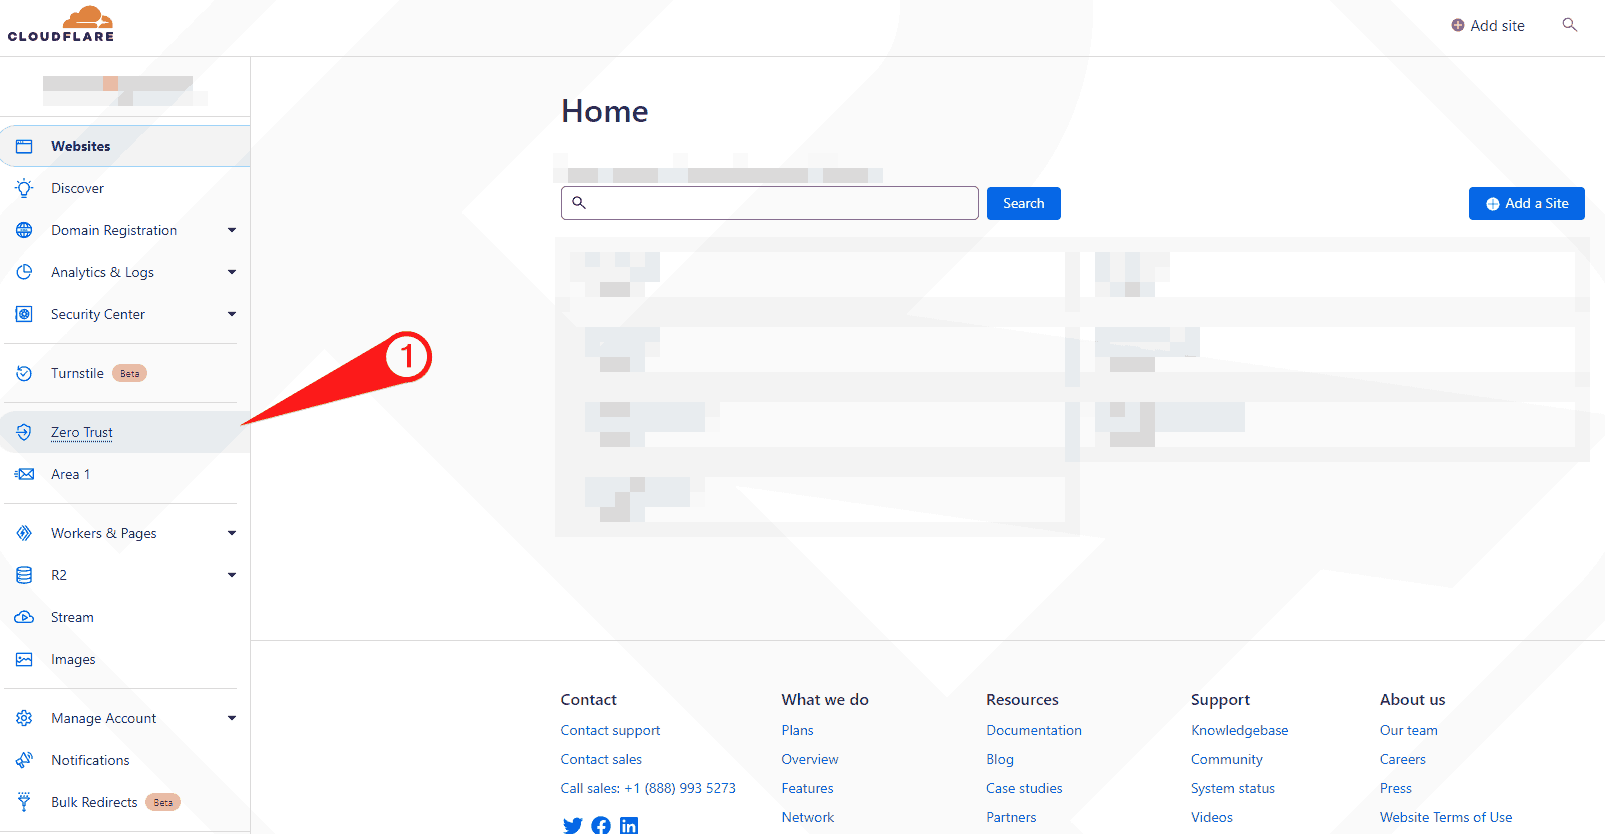
1. At the cloudflare homepage select Zero Trust.
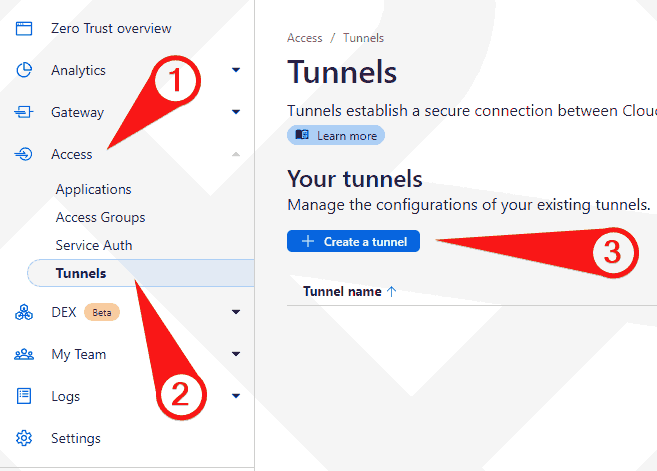
2. Select Access → choose Tunnels → press Create a tunnel.
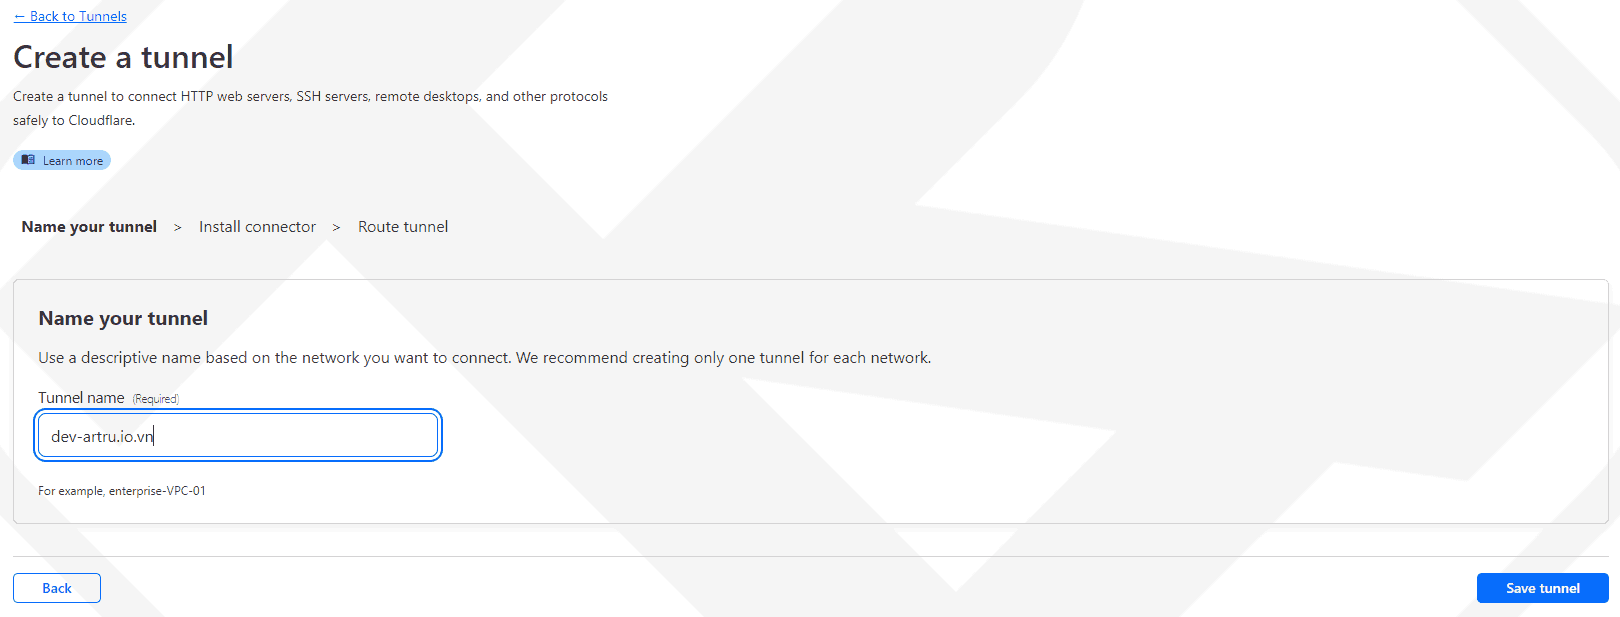
3. In the Name your tunnel field enter the name of your tunnel (no spaces) → press Save tunnel.
4. Select the operating system according to your device. As mine is Windows 64-bit → click download link Cloudflare.
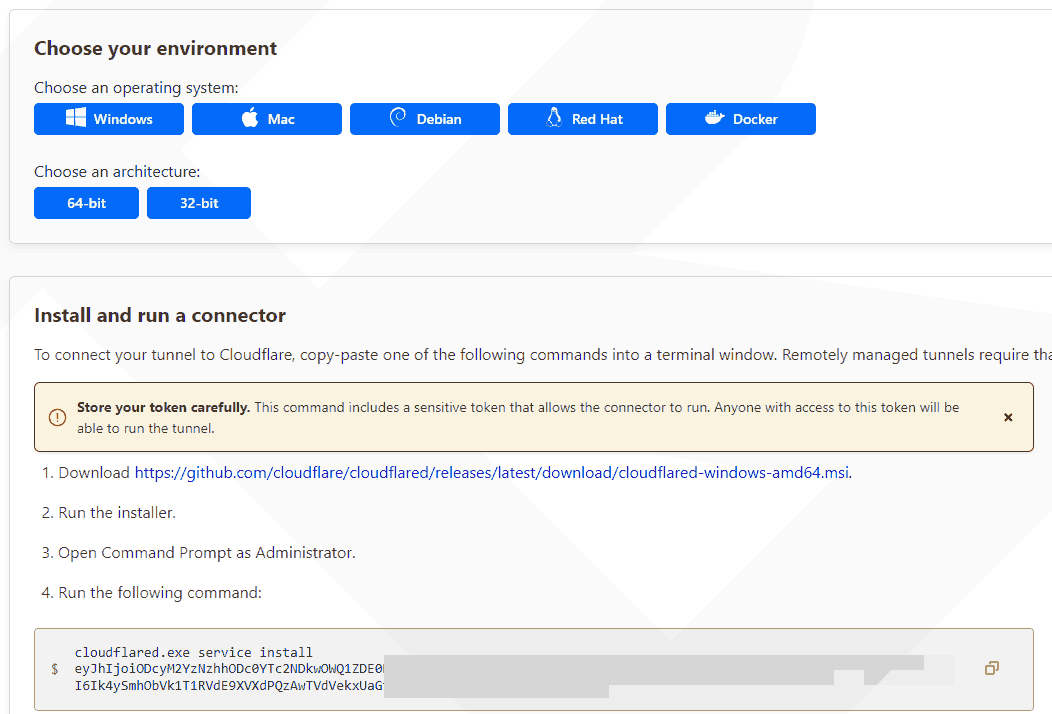
5. Double-click the file Cloudlared.msi Just downloaded to install.
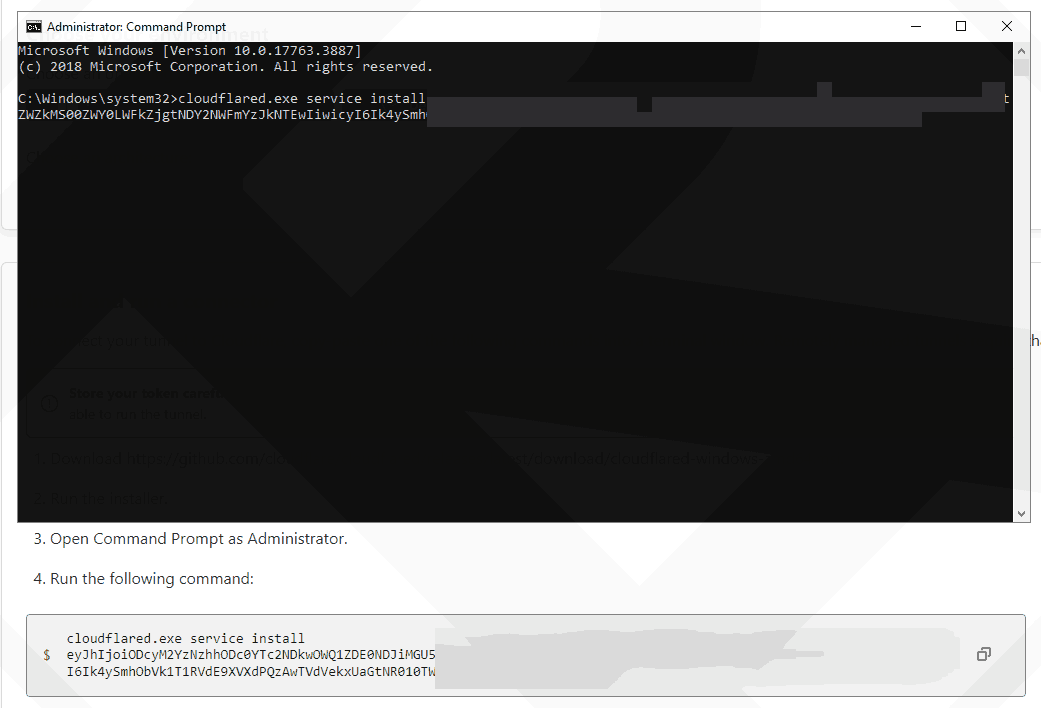
6. Open CMD with rights Administrator.
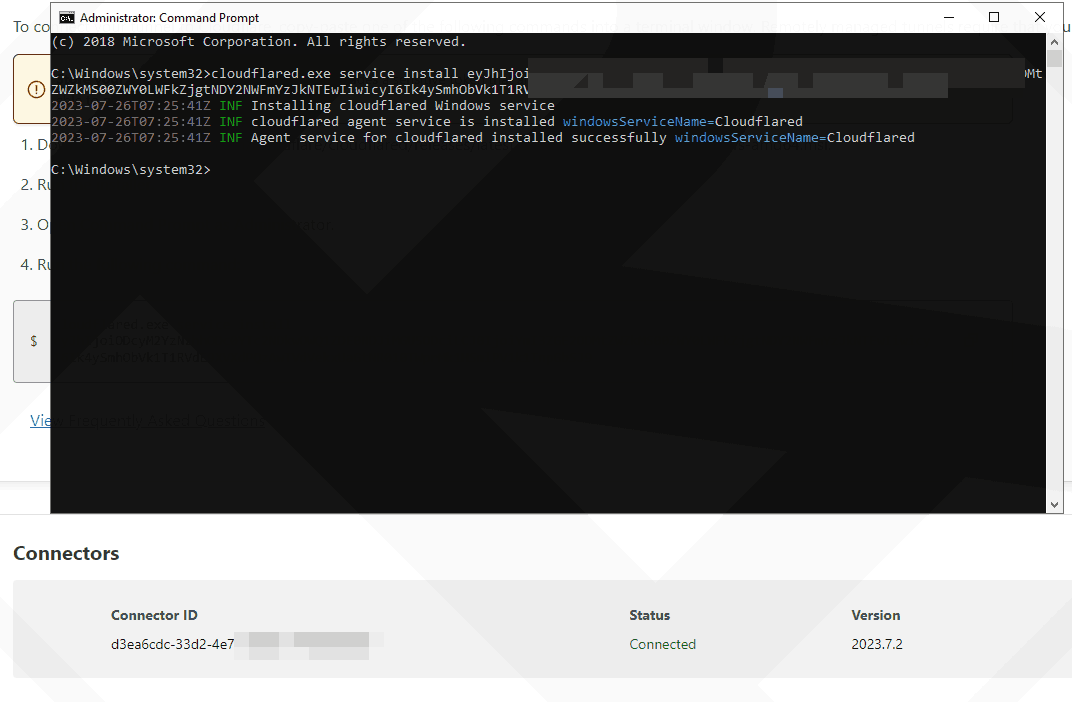
7. Copy and paste the code into CMD → press Enter.
8. If successful it will show the message Connected → press next.
9. Here please fill in the fields according to your needs.
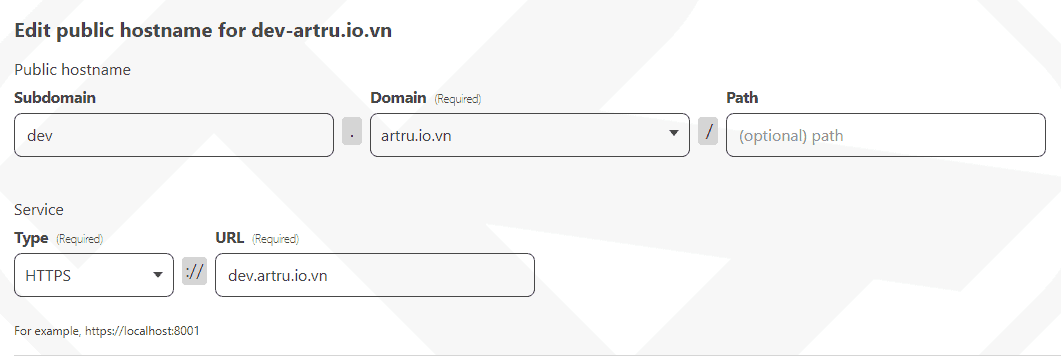
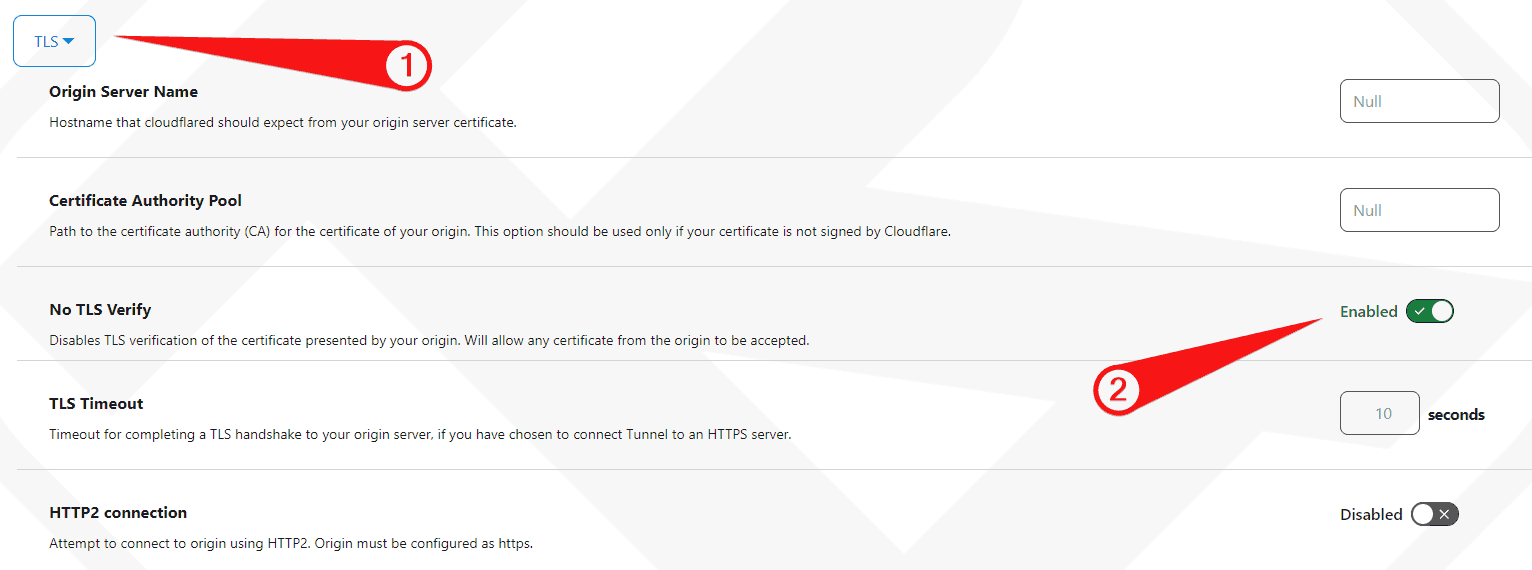
10. In the section TLS below please turn on No TLS Verify to avoid SSL errors.
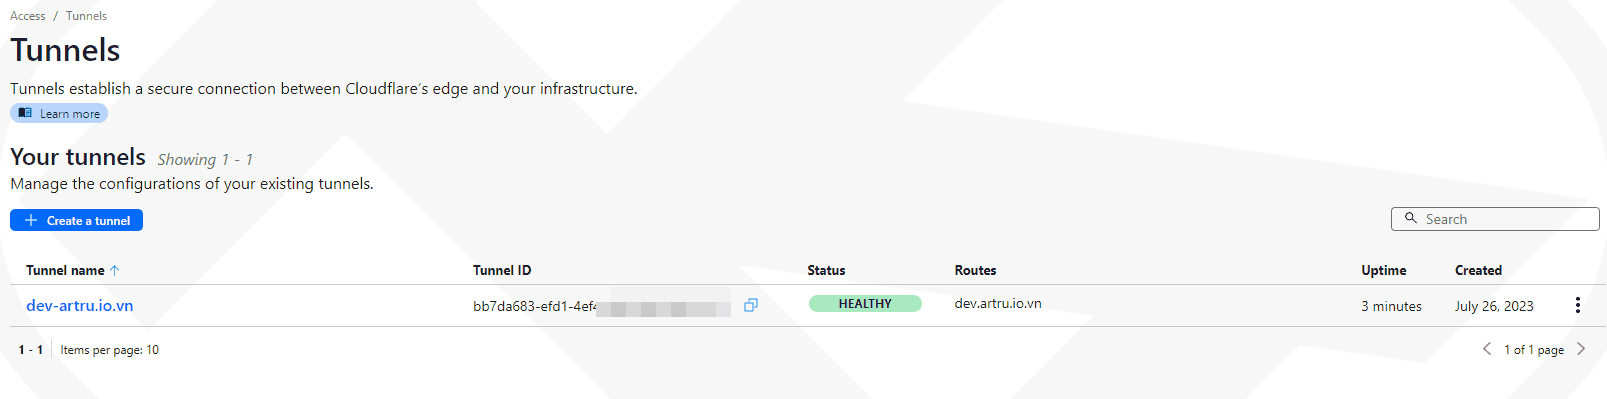
11. Press Save tunnel and if you see the Status message HEALTHY ie Tunnel is active.
Now use another device to test.

Turn Tunnel On/Off when not in use
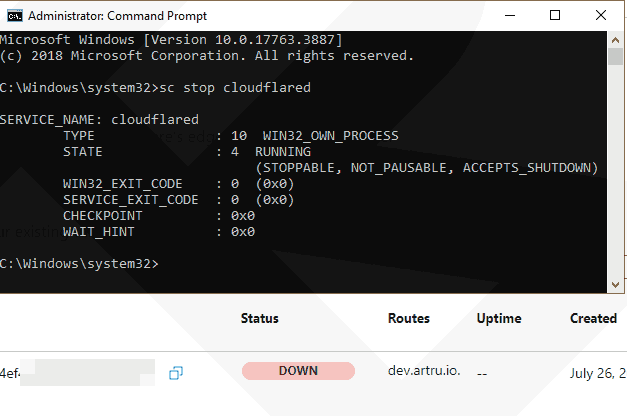
Using CMD
Open CMD with rights Administrator and enter the command below:
- Turn off:
sc stop cloudflared - Turn on:
sc start cloudflared
You can also create a .cmd file for faster operation. However, a little more tweaking is needed so that the file can run automatically with Admin rights.
- Right click on windows select new → Text Document
- Rename the file to your liking.
For exampleSTOP Cloudflared.cmd,STOP Cloudflared.cmd. - Click on the file you just created Edit and fill in the content below:
- To turn off:
@echo off
>nul 2>&1 "%SYSTEMROOT%System32cacls.exe" "%SYSTEMROOT%System32configsystem"
if '%errorlevel%' NEQ '0' (
    echo Requesting administrative privileges...
    goto UACPrompt
) else (goto gotAdmin)

:UACPrompt
    echo Set UAC = CreateObject^("Shell.Application"^) > "%temp%getadmin.vbs"
    set params = %*:"=""
    echo UAC.ShellExecute "%~s0", "%params%", "", "runas", 1 >> "%temp%getadmin.vbs"

"%temp%getadmin.vbs"
del "%temp%getadmin.vbs"
exit /B

:gotAdmin
sc stop cloudflared- To enable:
@echo off
>nul 2>&1 "%SYSTEMROOT%System32cacls.exe" "%SYSTEMROOT%System32configsystem"
if '%errorlevel%' NEQ '0' (
    echo Requesting administrative privileges...
    goto UACPrompt
) else (goto gotAdmin)

:UACPrompt
    echo Set UAC = CreateObject^("Shell.Application"^) > "%temp%getadmin.vbs"
    set params = %*:"=""
    echo UAC.ShellExecute "%~s0", "%params%", "", "runas", 1 >> "%temp%getadmin.vbs"

"%temp%getadmin.vbs"
del "%temp%getadmin.vbs"
exit /B

:gotAdmin
    sc start cloudflared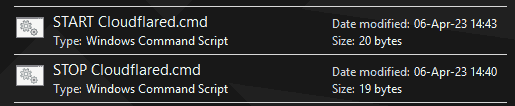
Please run this file with permissions Administrator Please.
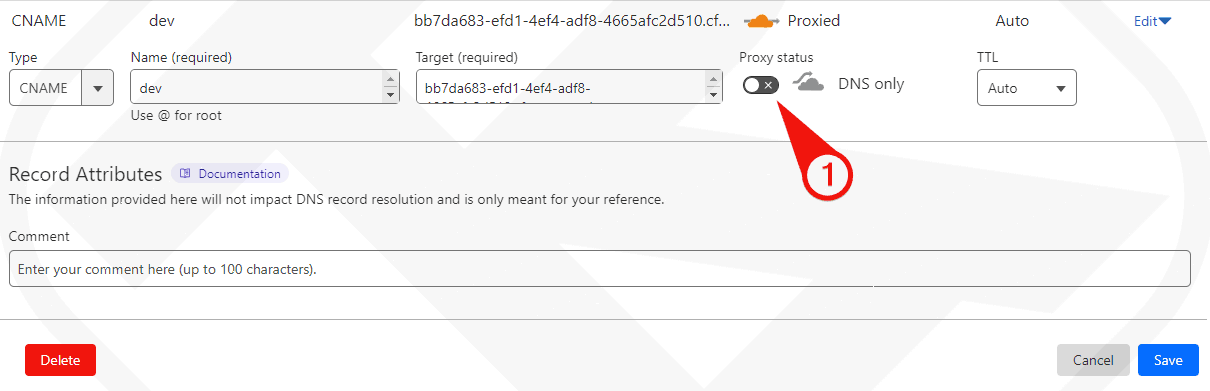
Using DNS CNAME Records
Or turn off with proxy (golden cloud) of CNAME records in the Cloudflare DNS management area.
Conclude
Thus, through the information presented above, we can see that Cloudflare Tunnel is a useful tool that allows you to share your website from localhost easily and securely. With benefits like built-in DDoS protection, load balancing, and encrypted tunnels, using Cloudflare Tunnel gives you more peace of mind in protecting your resources.
Hope this article will help you in better understanding Cloudflare Tunnel and how to use it.
See more at: Cloudflare Tunnel.


Comment