ExifTool - Generate Batch Image Metadata
ARTRU
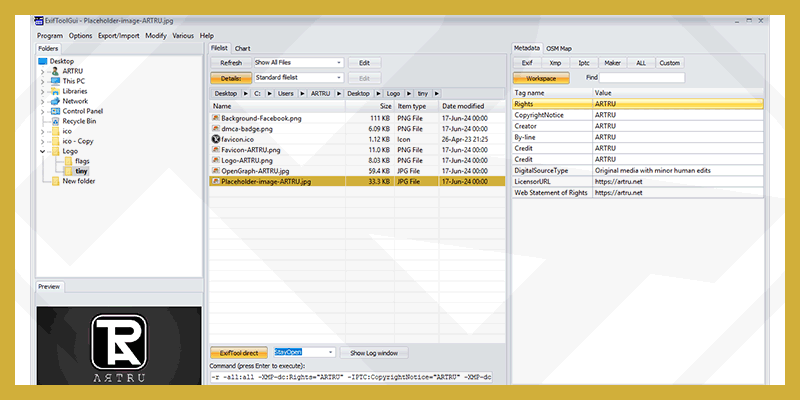

TABLE OF CONTENTS
ExifTool is a powerful and flexible tool that makes it easy to read, write and edit Metadata belong to image and many other file types. Developed by Phil Harvey, ExifTool supports many metadata formats such as EXIF, GPS, IPTC, XMP,...
In this article, I will guide you how to use ExifTool to create Image metadata mass
To get started, you need to install ExifTool on your device.
You can download it from ExifTool official website: ExifTool.org or GUI version (with interface) ExifTool.org/gui.
Or use the version ExifToolGUI Portable on Portable Apps store
Once downloaded, follow the instructions to complete the installation process.
In this tutorial, I use version ExifToolGUI Portable on Windows. You can set up similarly for other operating systems.
The first step is to put all the images that need to generate Metadata into a single folder. If you are using WordPress, you can download the folder /wp-content/uploads/ to create Metadata in bulk on the computer, then upload it back to the hosting.
In this example I use the directory ico set out Desktop Please.

When you open ExifTool you will see the old Metadata data.

Step 1: Click the button ExifTool direct on the bottom toolbar.
Step 2: Customize the code below to match your information and paste it into the box. Command. Then press Enter to perform mass Metadata changes for the selected folder.
-r -all:all -XMP-dc:Rights="ARTRU" -IPTC:CopyrightNotice="ARTRU" -XMP-dc:Creator="ARTRU" -IPTC:By-line="ARTRU" -XMP-photoshop:Credit="ARTRU" -IPTC:Credit="ARTRU" -XMP-iptcExt:DigitalSourceType="Original media with minor human edits" -XMP-plus:LicensorURL="https://artru.net" -XMP-xmpRights:WebStatement="https://artru.net"Explanation of the above code:
-r This stands for "recursive". This option allows ExifTool to process all files in the specified directory including its subdirectories.-all:all This option is to clear all old Metadata before adding new Metadata. Because sometimes images use unique Metadata that is not always necessary for SEO, so the best way is to delete it completely.-XMP-dc:Rights="ARTRU" -IPTC:CopyrightNotice="ARTRU" -XMP-dc:Creator="ARTRU" -IPTC:By-line="ARTRU" -XMP-photoshop:Credit="ARTRU" -IPTC:Credit="ARTRU" -XMP-iptcExt:DigitalSourceType="Original media with minor human edits" -XMP-plus:LicensorURL="https://artru.net" -XMP-xmpRights:WebStatement="https://artru.net" This line is the Metadata added to the file, please change it to your own information.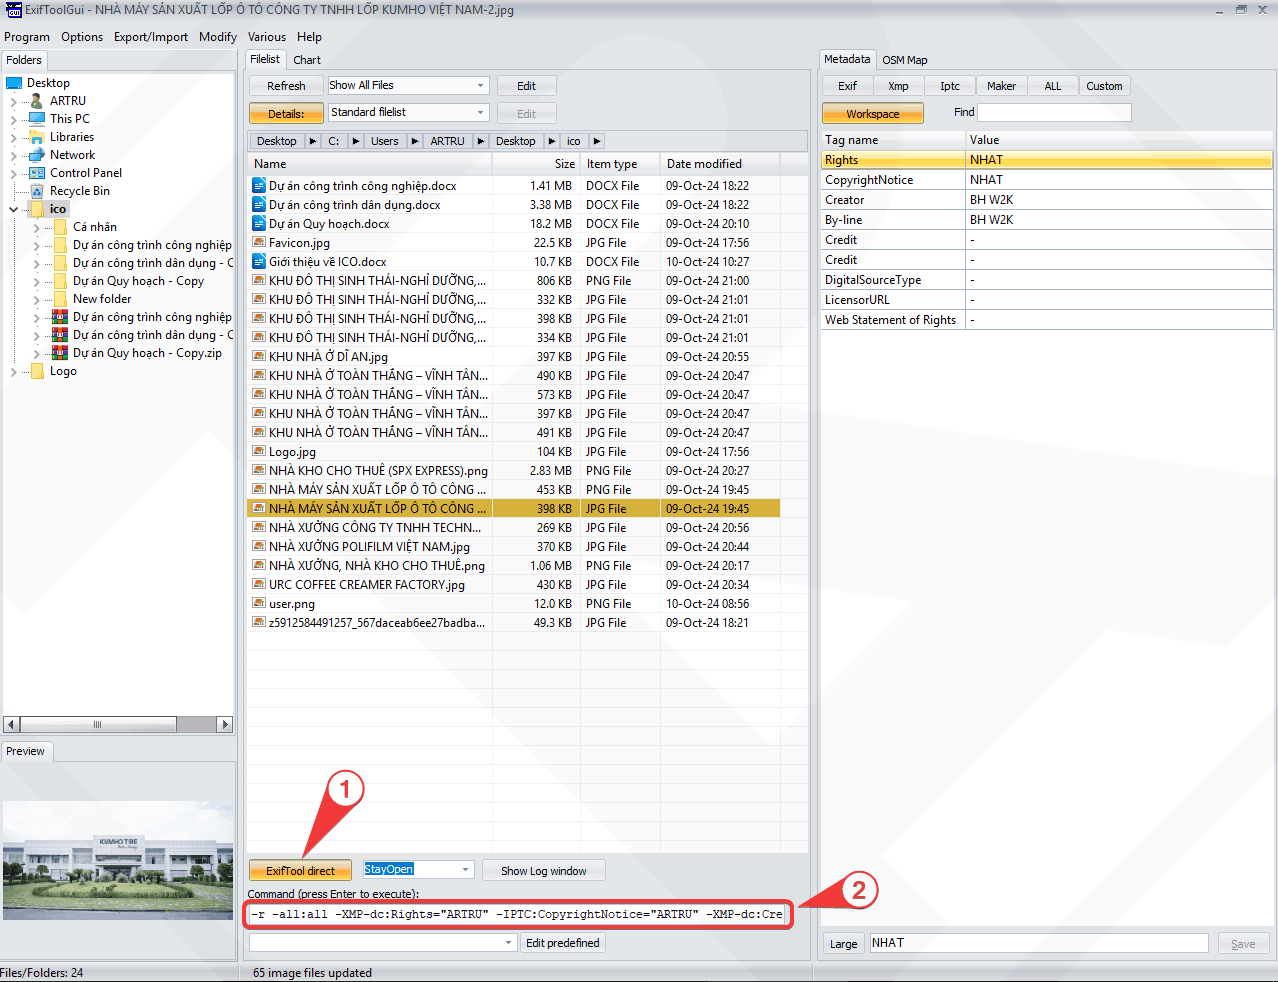
The Metadata for the above images I refer to from the Google Images SEO. You can completely customize the above code as you wish.
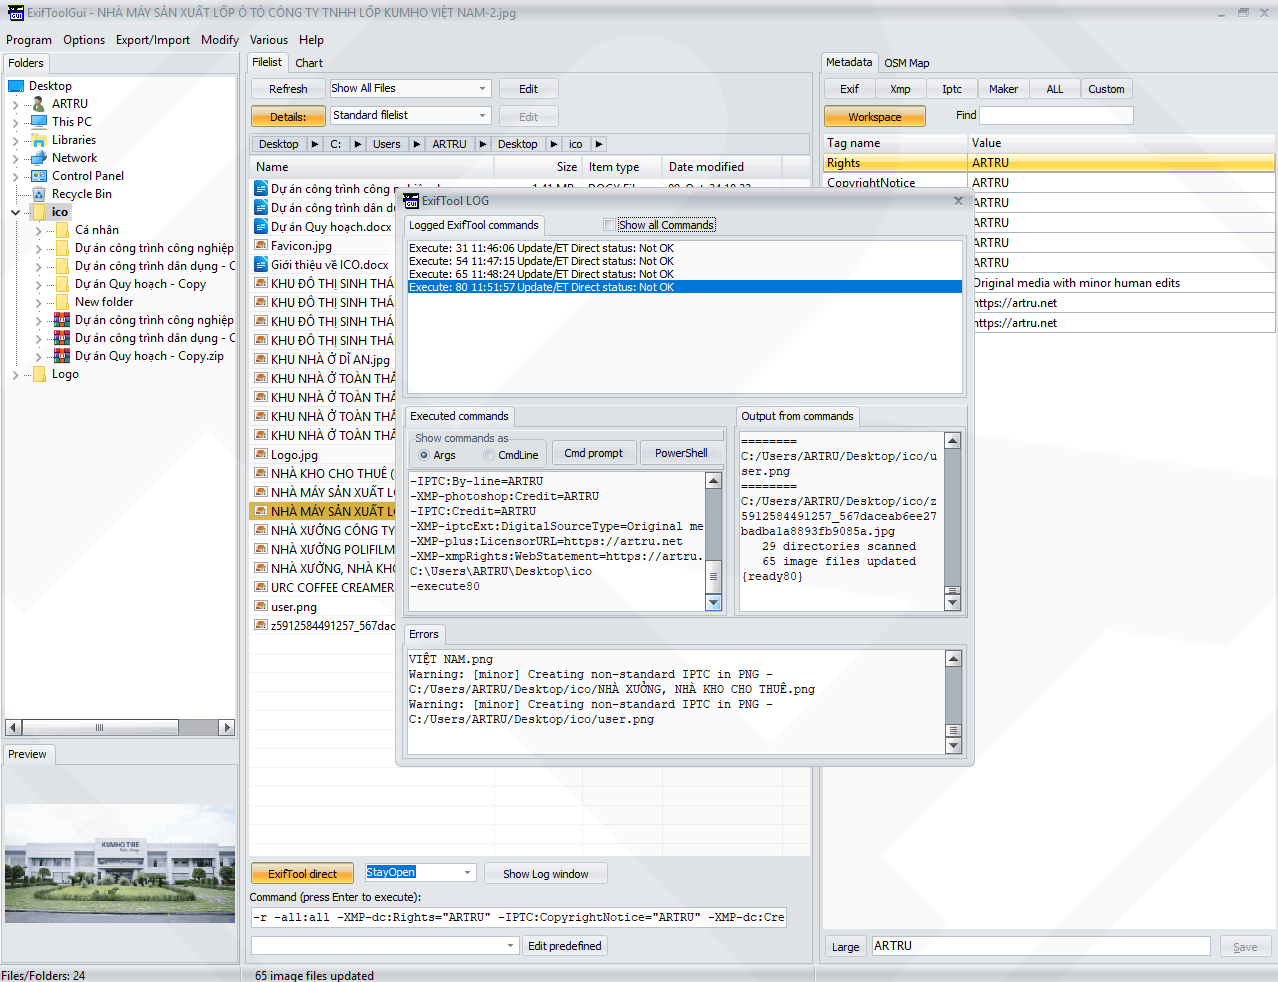
After clicking enter then this ExifTool LOG table will appear. You notice that the right column has changed Metadata.
The result after adding Metadata is that Google Image Search will display Metada information here.

Related Articles