It seemed like this job was simple, but when I encountered it, it took me quite a bit of time to handle it.
In the case of receiving customer projects, we limit asking for Admin login accounts and passwords. I also do not ask customers to create new user accounts, but add them themselves in phpMyAdmin. After completing the project, I will delete this account and hand it over to the customer.
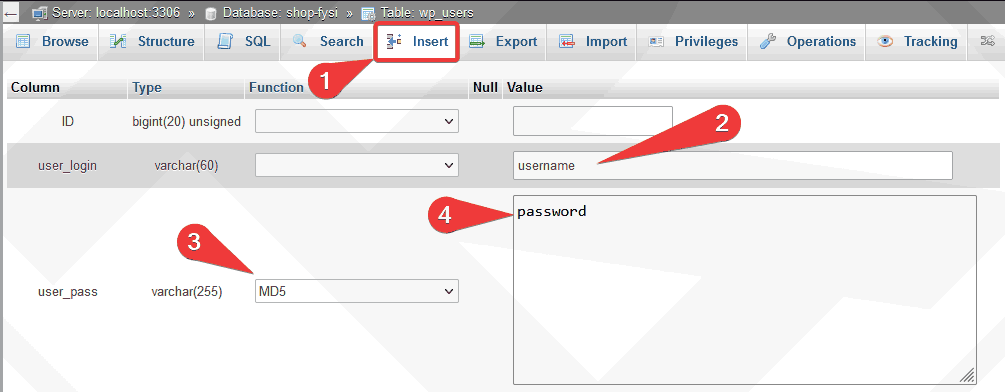
Bước 1: Tạo user mới trong bảng “wp_users”
- Access to phpMyAdmin → go to the table
wp_users - To create a new account, click
Insertin the top bar. - user_login: Enter your login name.
- user_pass: select
MD5→ then enter the password for this new account. - Scroll down and press the button
Goto create. - After the step above, you will see a new user just created ID. You need to copy the code ID This.
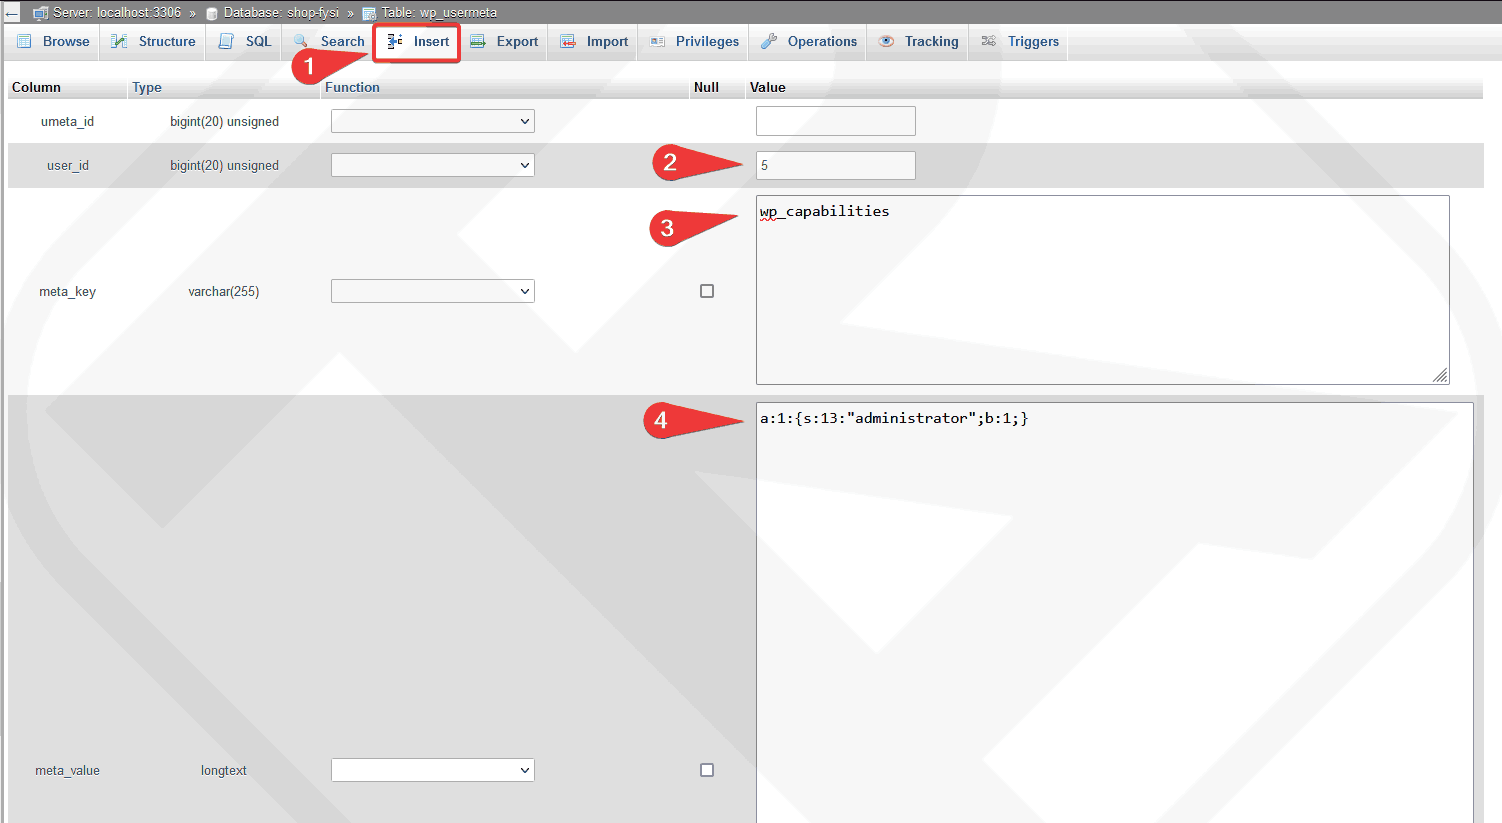
Bước 2: Phân quyền user trong bảng “wp_usermeta”
- Go to the board
wp_usermeta - Press
Insertin the top bar of the tablewp_usermeta - user_id: fill in the code ID that you created in step 1. For example my ID is 5.
- meta_key: gõ “
wp_capabilities“. - meta_value: gõ “
a:1:{s:13:"administrator";b:1;}“. - Scroll down and press the button
Go.
So you have completed creating a new account in phpMyAdmin. Good luck.


Comment