Combine Subdomain and Cloudflare as a free image CDN
ARTRU
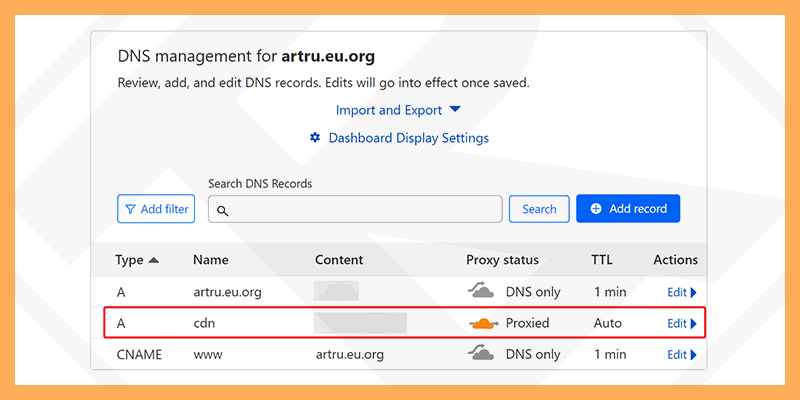

TABLE OF CONTENTS
"CDN" is probably not too strange to you anymore. CDN helps the website greatly reduce the number of requests, while also helping the website load faster. This also more or less affects scores on speed measuring tools such as Google Speed Insights, GTmetrix,...
Search online and you'll find many articles on how to set up a CDN. There are advantages and disadvantages of each tool. In this article, I will show you how to use a subdomain as a free image CDN from Cloudflare using the W3 Total Cache plugin.
To clearly understand how it works, I will summarize the implementation process as follows:
You can still use your current hosting for your main website as a CDN. And I take advantage of free hosting to store images. You can consult 123host or Azdigi.
The step of pointing the DNS record from the subdomain to the secondary hosting you can do yourself or refer to online. The operation is the same as pointing the main domain name. I won't instruct you again.
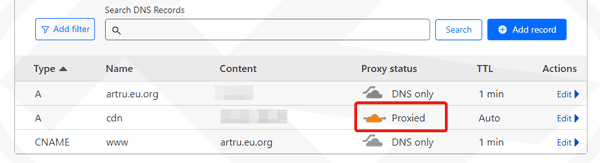
If you only use CDN for subdomains, you do not need to add 2 A and CNAME records or turn it off altogether golden cloud (Proxy) for the main domain.
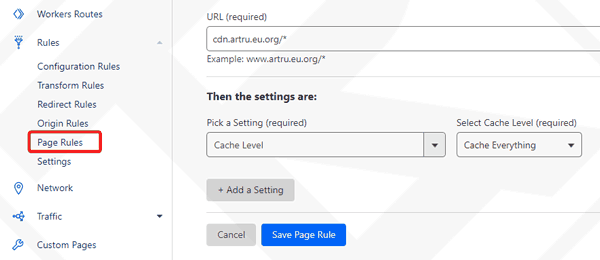
Don't forget to turn on the mode Cache Everything in Cloudflare.
About the folder structure to save images on subdomains. Please set it up as on the main website.
For example, the image link on the main website is:
domain.com/wp-content/uploads/2023/10/abc.jpgThen the image link for CDN is:
cdn.domain.com/wp-content/uploads/2023/10/abc.jpgThen you need to create an account FTP to populate the W3 Total Cache plugin.
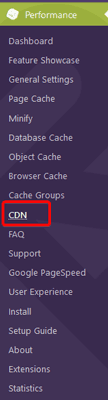
1. Performance → General Settings → CDN.
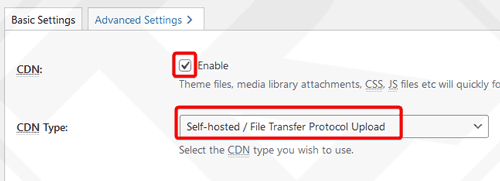
2. Move to item CDN to set details.
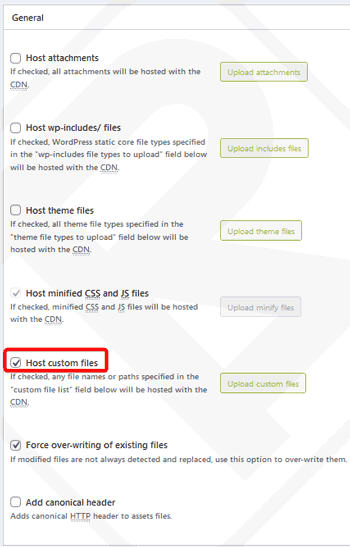
3. Because I only want to create a CDN for images without including css, js, ... so I will check it Host custom files.
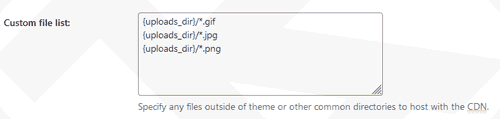
4. Scroll down to the section Advanced find Custom files list. Create CDN for images so I will fill this section as follows:
5. Part Configuration: Objects You fill in the FTP configuration information.
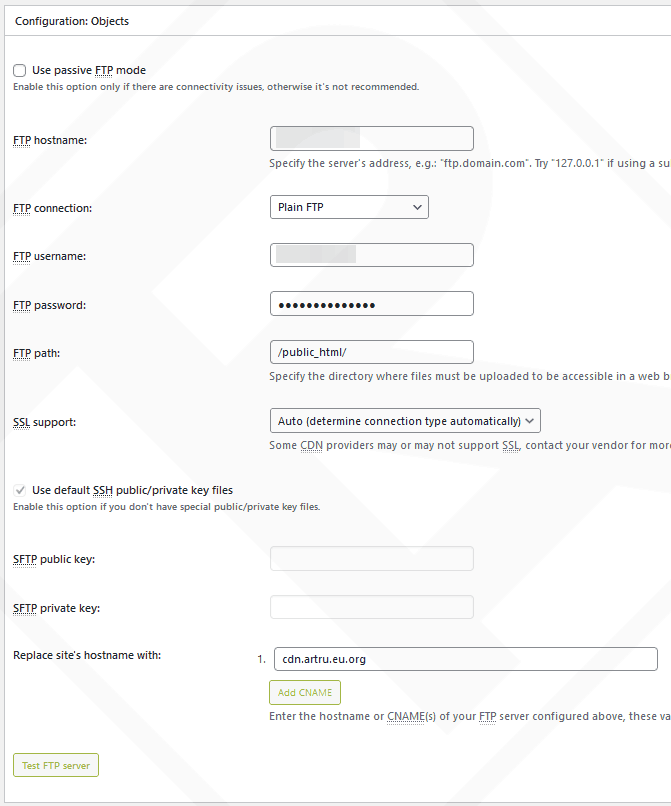
6. Because these options are not necessary for me, I left them all blank.
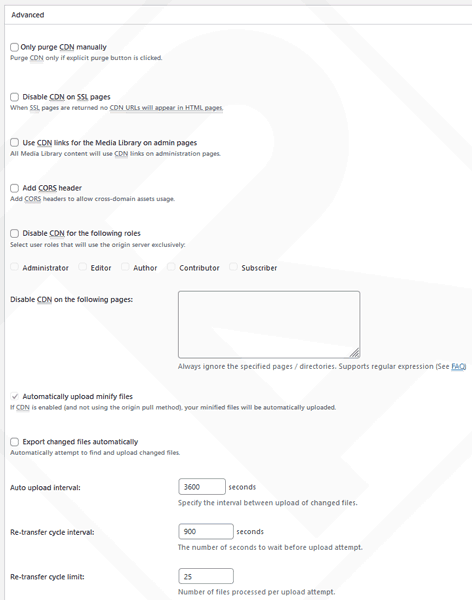
From now on, every time you upload a new image, W3 Total Cache will automatically push that image to secondary hosting.
To check the image urls in the sitemap, access the post's sitemap link. As mine is https://artru.net/post-sitemap.xml
Then right click → select View page source (or press the shortcut Ctrl + U). When not configured, the image url is still the original url.
You need to insert this code into the file functions.php of the theme or the Code Snippets plugin. This is the filter that Rank Math provides. If you use another SEO plugin, you can find similar documents.
Rank Math source: Filter to Add CDN Image URLs in the Sitemap.
Replace domain.com with your domain name.
/**
 * Filter to Add CDN Image URLs in the Sitemap
 *
 * @param string $src  Image URL.
 * @param object $post Post object.
 */
add_filter( 'rank_math/sitemap/xml_img_src', function( $src, $post ){
	$src = str_replace( 'http://domain.com', 'https://cdn.domain.com', $src );
	return $src;
}, 10, 2);
For a new sitemap to be created, you need to go in Sitemap Settings of Rank Math → Increase or decrease the number Link Per Sitemap and press Save Changes.
This is probably the part that people pay little attention to. However, if not set up correctly, CDN images will be considered duplicate content, because the image with the original url is still being indexed.
To better understand the impact of Canonical on SEO, please refer to the content How to specify a canonical with rel="canonical" and other methods by Google.
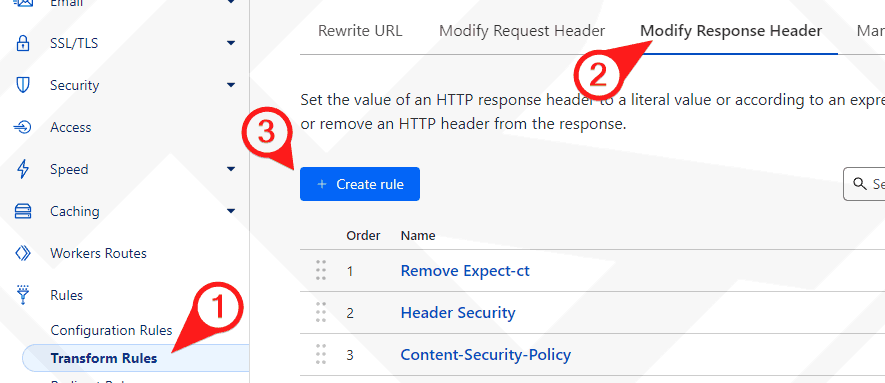
To do this, access the section Transform Rules → Modify Response Header in Cloudflare.
You can refer to my Canonical configuration.
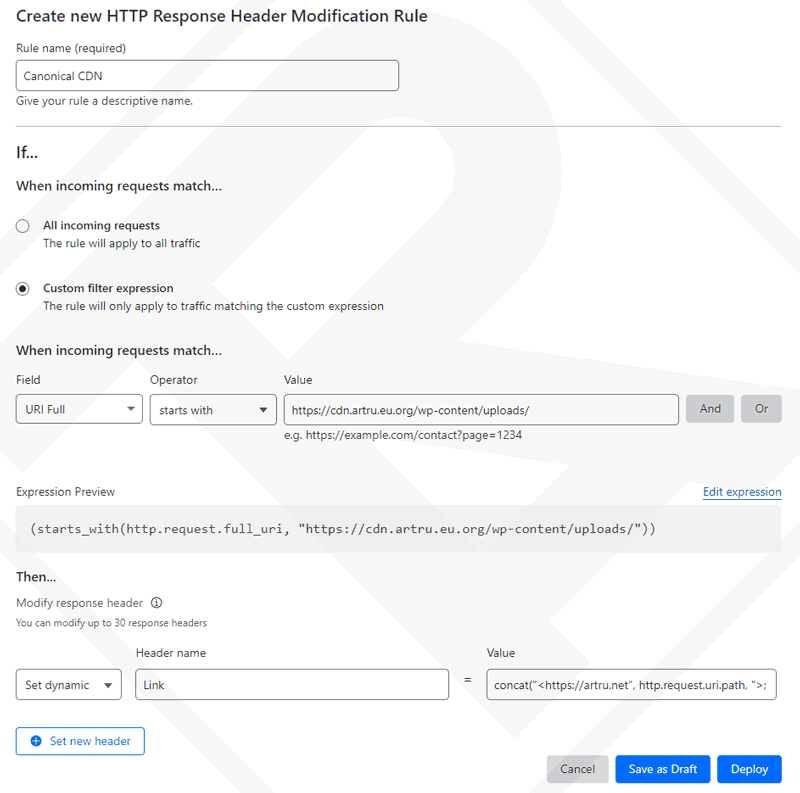
(starts_with(http.request.full_uri, "https://cdn.artru.eu.org/wp-content/uploads/")) means URLs that start with https://cdn.artru.eu.org/wp-content/uploads/ Canonical configuration will be applied.
Next choose Set dynamic
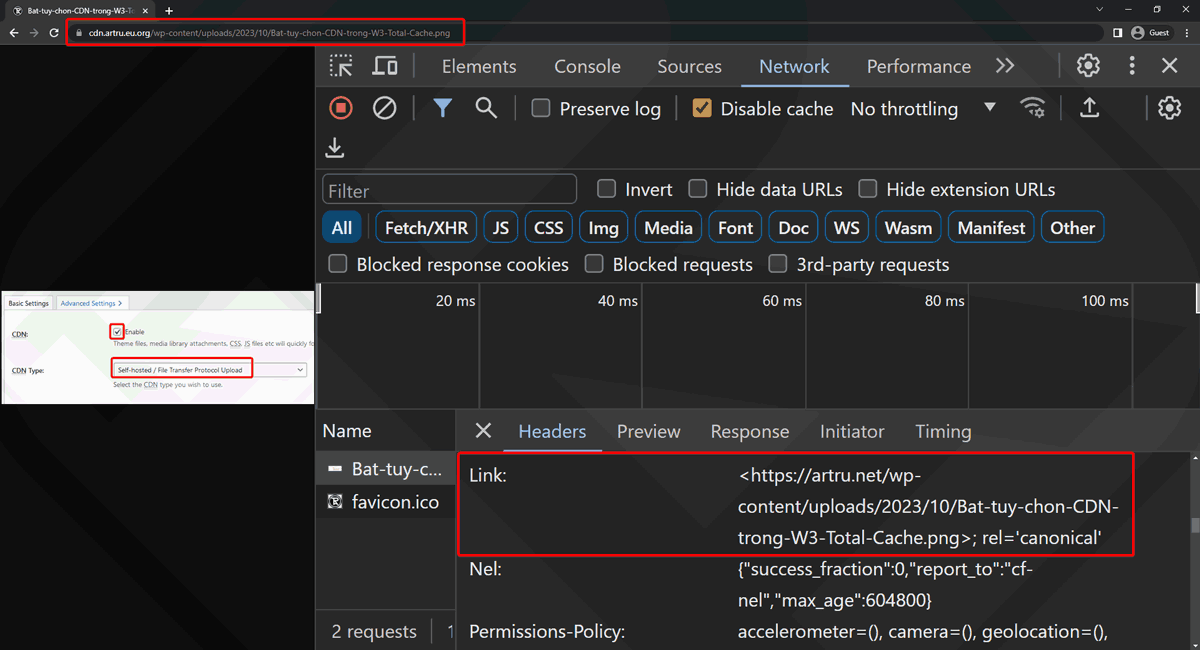
Linkconcat("<https://artru.net", http.request.uri.path, ">;", "rel='canonical'").https://artru.net/wp-content/uploads/ is considered the root URL of https://cdn.artru.eu.org/wp-content/uploads/.To check further you should open an image file with a CDN url. Press F12 (Dev Tools).
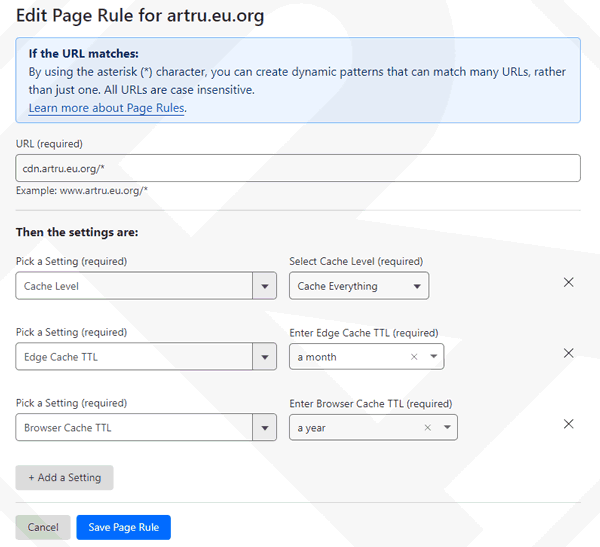
Because the entire file is static and changes little. You should set the highest expiration time for Cache Browser (User browser cache) to 1 year, Cache Edge (Cloudflare's cache time for Hosting) to 1 month.
Because the cache is stored for a long time. In case you change the image but keep the file name the same, you must clear the cache in Cloudflare for all changes to be applied.
Related Articles